Start Here, Start Simple
Your First Hammered Flower Print Is Closer Than You Think
I remember the exact moment my first cornflower transferred its indigo onto a scrap of calico — the colour was richer than I expected and the shape was almost perfect. That experience is well within your reach, and this guide walks you through every step I wish I'd had on day one.
Hammered flower printing requires no specialist equipment, no formal art training, and no expensive supply list. What it does require is fresh botanical material, a willing surface, and a little patience with the process.
- No specialist equipment needed — a household hammer is genuinely sufficient to begin
- Fresh flowers from your own garden or a local market are your primary material
- Results vary beautifully with each session — that variation is a feature, not a flaw
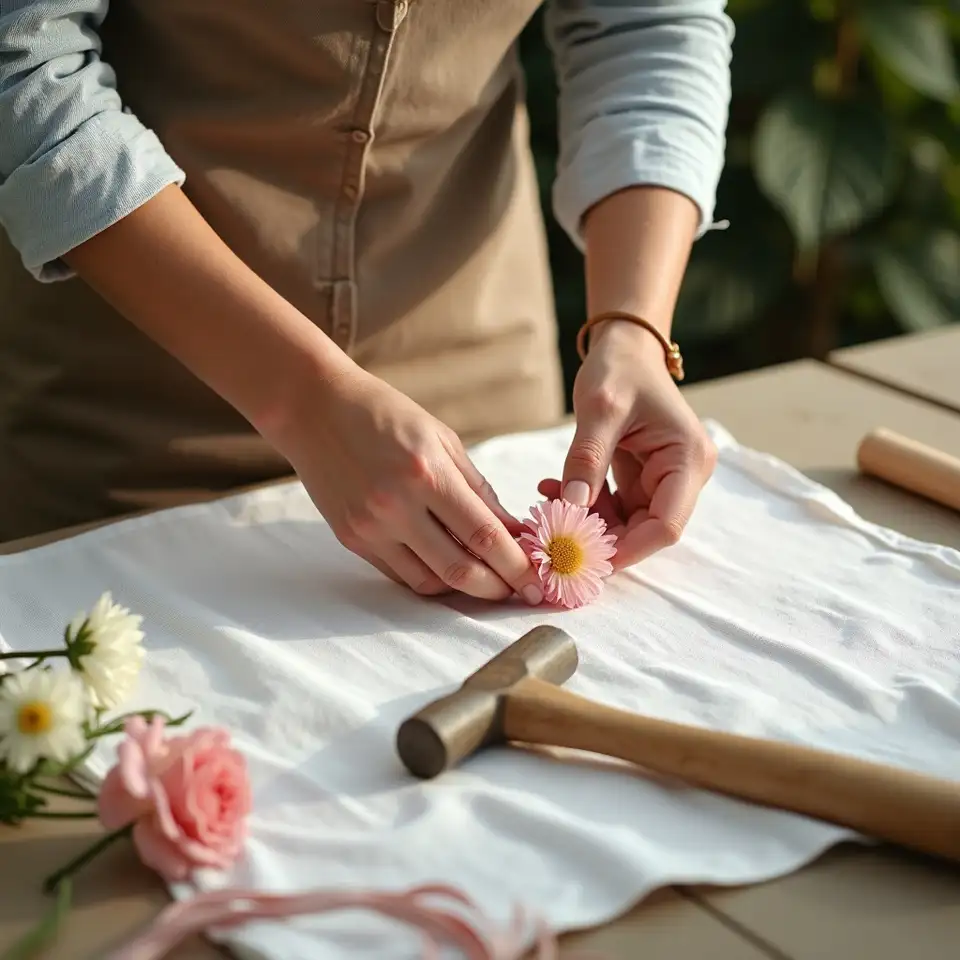
First Print
Day 1
Most beginners complete a first successful print within their very first session, using flowers from their own garden
No experience needed
Ready now
The Full Hammered Flower Printing Workflow, Step by Step
I've refined this workflow across many seasons of printing. Each step matters, and skipping one tends to show up clearly in the finished result — so I've kept the explanations honest about why each stage earns its place in the process.
Tips and Techniques Worth Knowing Before You Start
Advice drawn from many seasons of experimentation — covering which species perform best, when to pick them, how to get the most vivid colour, and the mistakes I see most often in beginners' early sessions
Best Flower Species to Begin With
Plant Selection
Not every flower hammers well, and knowing which species to reach for first saves a great deal of frustration. From my own cataloguing work across Australian garden species, the most reliable starters are pansies, cornflowers, coreopsis, and marigolds. These share useful traits: high moisture content, vivid pigment concentration, and a relatively flat profile that transfers cleanly under hammer pressure. Native species like everlastings and billy buttons also perform surprisingly well and are worth experimenting with once you have a few sessions under your belt. Avoid thick, waxy, or very dry flowers in your first attempts — their pigment transfer tends to disappoint and can discourage a beginner unfairly.
Start with pansies
Try coreopsis next
Explore native species
Ongoing
Beginner
Picking at the Right Moment in the Season
Seasonal Timing
The timing of your harvest matters more than most beginners expect. Flowers picked at peak bloom — just as they've fully opened but before they begin to brown at the petal edges — contain the highest concentration of transferable pigment. In Melbourne's climate I find late spring and early summer mornings produce the best material: temperatures are moderate, humidity is reasonable, and blooms are at their fullest. Pick after the morning dew has dried but before the afternoon heat draws moisture from the petals. In subtropical climates like Queensland, the window shifts seasonally — Priya's species notes in the community section address this in useful detail for northern makers.
Pick at full bloom
Harvest in the morning
Avoid browning edges
Seasonal
Beginner
Getting the Most Vivid Colour Transfer
Colour Technique
Colour vibrancy depends on three interacting factors: the freshness of the botanical material, the receptivity of the printing surface, and the consistency of your hammer pressure. I've found that lightly misting cotton or linen with clean water immediately before printing dramatically improves pigment uptake — the moistened fibre draws colour in rather than simply receiving it on the surface. Using a smooth wooden hammer rather than a metal one also makes a difference, as metal heads can bruise and smear petals rather than pressing them evenly. Covering your flower with a single layer of baking paper before striking protects the petal's structure and distributes force more uniformly across the shape, which translates directly into cleaner edges and richer colour in the finished print.
Mist the surface first
Use baking paper cover
Apply even pressure
+1
Per session
Intermediate
Common Beginner Mistakes to Avoid
Mistake Prevention
The mistake I see most often is using flowers that are even slightly past their prime. A bloom that looks fine in the vase can be half-drained of transferable pigment, and the resulting print will be pale and patchy. The second most common issue is insufficient hammer pressure — people are often tentative with their first few strikes, worried about overdoing it, when in reality firm and consistent pressure is exactly what transfers pigment cleanly. A third frequent problem is lifting the baking paper too early or repositioning the flower mid-print, which smears the image. Set the flower, cover it, hammer it completely, then lift in one clean movement. Patience at that final stage makes an enormous difference to the crispness of what you reveal.
Use only fresh flowers
Commit to firm strikes
Lift paper once only
Every session
Beginner
Hammered Flower Printing Glossary
A reference guide to the technical terms used throughout this site, designed to help beginners engage confidently with the craft's vocabulary without needing a botanical or textile background
Hapa Zome
Craft OriginsThe Japanese term for the practice of transferring plant pigment directly onto fabric by pounding or hammering. The phrase is widely used in botanical craft communities internationally and refers specifically to the direct-contact pigment transfer method described throughout this site.
Pigment Transfer
Core ProcessThe process by which the natural colouring compounds contained within a flower or leaf migrate from the plant cell onto a receiving surface — fabric or paper — under applied mechanical pressure. The quality of transfer depends on freshness, surface type, and the consistency of hammer force applied.
Mordant
Colour ChemistrySubstrate
MaterialsAnthocyanin
Pigment ScienceChlorophyll
Pigment ScienceThe green pigment present in leaves and some flower parts. Chlorophyll transfers readily under hammer pressure and produces rich green tones in hammered prints. It tends to fade to yellow-brown over time as the molecule breaks down when exposed to light and oxygen, a process that is slowed but not fully prevented by fixatives.
Tannin
Colour ChemistryA naturally occurring astringent compound found in many plant species, including oak galls, tea, and some flowers. Tannins act as natural mordants on protein fibres such as silk and wool, improving the bonding of other pigments to those surfaces. Including tannin-rich botanicals in a print can enhance the staying power of surrounding colours.
Fixative
FinishingBaking Paper
ToolsAlso called parchment paper, this is placed over the flower or leaf before hammering to protect the petal's structure, distribute impact force evenly, and prevent plant material from sticking to the hammer face. Using a single smooth layer of baking paper consistently improves the clarity of edges and the evenness of pigment transfer.
Wash-Fastness
MaterialsA measure of how well a colour on fabric resists fading or bleeding when the fabric is washed. Hammered flower prints on natural fibres have varying wash-fastness depending on the species used, the mordant applied, and the fibre type. Most hammered prints are best treated as decorative rather than functional textiles unless mordanted carefully.
Resist
TechniqueCarotenoid
Pigment ScienceA family of yellow, orange, and red pigments found in flowers such as marigolds, sunflowers, and coreopsis. Carotenoids are among the more stable natural pigments in hammered printing, holding their colour longer than anthocyanins under comparable conditions and making carotenoid-rich species an excellent choice for prints intended to last.
Beginner Questions Answered
What tools do I actually need?
Tools
The honest answer is very little: a hammer, a firm flat surface, some baking paper, and your chosen printing substrate — fabric or paper. A wooden or rubber mallet is preferable to a metal hammer for more even pressure distribution, but I started with a standard claw hammer from a kitchen drawer and produced perfectly good early prints. You do not need a press, specialist inks, or any electronic equipment.
You Have Everything You Need to Begin Right Now
The techniques on this page are drawn from genuine practice across many seasons and species. I've tried to give you an honest, complete picture of what the process involves — including the parts that take patience and the results that might surprise you. The best way to learn hammered flower printing is to pick a flower, find a surface, and strike with intention. Everything else follows from that first print.
1
Choose fresh flowers from your garden or market
Select species with high moisture content and vivid colour — pansies, cornflowers, and marigolds are reliable starters. Pick on the morning of your session for the freshest possible material and the most responsive pigment transfer.
15 minutes
1
Choose fresh flowers from your garden or market
Select species with high moisture content and vivid colour — pansies, cornflowers, and marigolds are reliable starters. Pick on the morning of your session for the freshest possible material and the most responsive pigment transfer.
15 minutes
2
Set up a firm flat workspace with your materials
Place a wooden board over a folded towel, lay your chosen fabric or paper flat, and have your baking paper and hammer ready. A clean, stable surface makes an enormous difference to the consistency of your pressure and the crispness of your prints.
10 minutes
2
Set up a firm flat workspace with your materials
Place a wooden board over a folded towel, lay your chosen fabric or paper flat, and have your baking paper and hammer ready. A clean, stable surface makes an enormous difference to the consistency of your pressure and the crispness of your prints.
10 minutes
3
Position, hammer, and reveal your first botanical print
Place the flower face-down, cover with baking paper, and strike firmly and evenly across the full shape. Lift in one clean movement to reveal the transferred pigment beneath. That moment of lifting is genuinely one of the most satisfying in all of botanical craft.
5 to 10 minutes
3
Position, hammer, and reveal your first botanical print
Place the flower face-down, cover with baking paper, and strike firmly and evenly across the full shape. Lift in one clean movement to reveal the transferred pigment beneath. That moment of lifting is genuinely one of the most satisfying in all of botanical craft.
5 to 10 minutes
4
Fix and care for your finished print
Once fully dry, apply your chosen fixative and allow it to set before handling. Store the finished piece away from direct sunlight. Document which species and surface you used — your own notes become the most valuable reference you'll own as your practice develops.
30 to 60 minutes
4
Fix and care for your finished print
Once fully dry, apply your chosen fixative and allow it to set before handling. Store the finished piece away from direct sunlight. Document which species and surface you used — your own notes become the most valuable reference you'll own as your practice develops.
30 to 60 minutes
Ready to Explore Specific Project Ideas?
If the basics here have given you enough confidence to pick up a hammer, the project ideas section of this site offers structured creative directions for makers at every level — from a simple first fabric swatch to more ambitious compositions using multiple species and resist techniques. Browse at your own pace and take what's useful.
Techniques tested across multiple seasons
Honest about trade-offs and limitations
Welcoming community of Australian makers
No equipment costs to begin